After the first step when I have explained how to model the architectural part of the building and its roof, today I’ll describe the most convenient way to design Rafter roof:
I’ll make rafters using Rafter+ tool from Wood Framing Pro suite. It works out of the box. Rafter+ has its own modifiable structural framings, which loads as soon as you use one of its functions for rafter system distribution.
Only the architectural part of roof has to be done if you want to use Rafter+. The same as shown in a picture above. Here I used Default 125 mm roof from Revit® template. I have separate roofs for dormers joined to main roof top plane.
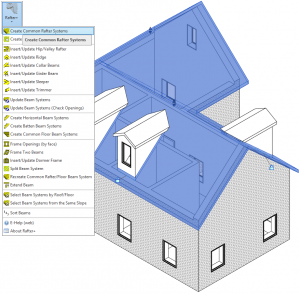
The work is straight forward find Rafter+ menu under T4R: Wood Framing tab in a Revit® ribbon. Select the main roof and press Create Common Rafter Systems. As we have some articles in which we explain how Rafter+ works I won’t get into much detail about it. It will read the surfaces and insert Beam Systems for all roof slopes.
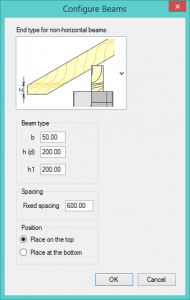
My starting configuration is this (Height of the beam is 200mm (7.87 in), width 50mm (1.97 in), cut 200mm (7.87 in) and spacing 600mm (3.94 ft.) I will also want my rafters to be inside the roof thickness, so I will place Beam systems on top roof faces:
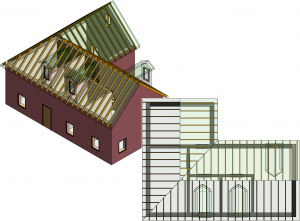
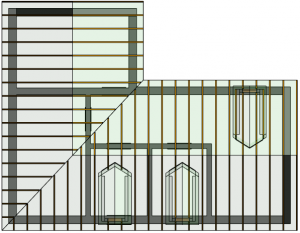
After that we get something like this:
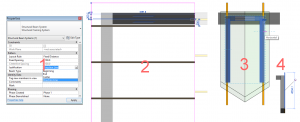
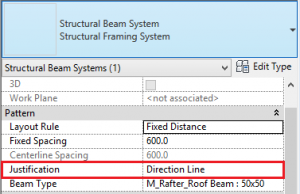
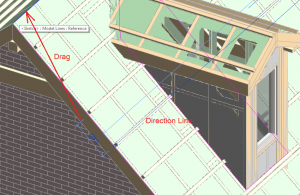
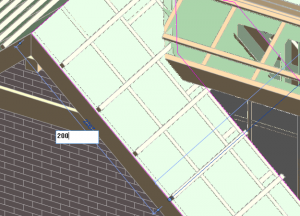
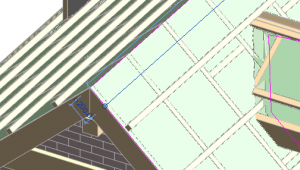
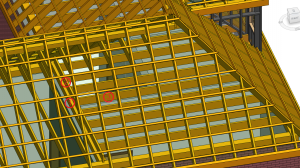
Beam systems need some modification to align to our architectural model. As these are Revit® beam systems we can easily align them using Direction Line. Let’s do this. I will lower the spacing to 1100mm (3.61 ft.), as my dormers are 900mm between walls (interior – interior)(1). Then align gable ends to structural part of walls (2), and move dormers a little bit to align them to rafters (3) and lastly as my right gable end rafters cannot be perfectly aligned I need to unlock last rafter to move them a little bit to the left.(4). And the final result is in a picture below.
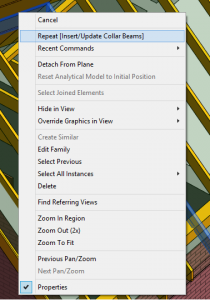
Revit® TIP: You can easily repeat the command you used by easily selecting object for function use and press right mouse button to find a repeat capability for that function.
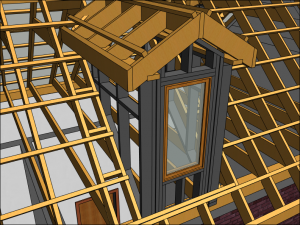
Next, I will create openings, frame them, insert valley and hip rafters, ridges, collar beams, girders and trimmers and battens. When everything is done, use Update Beam Systems to cut all beams together.
All of this is done with Rafter+ functions. For dormer roof walls I used Wall+ to frame the dormer.
To create battens I used Create Horizontal Beam Systems in Rafter+. To align them I’ve modified beam systems in Revit® like that:
- Select the Batten beam system and go to edit boundary, then in beam system properties define, that you want to align them by direction line.
- After that, define your direction line constraints to be your top of the roof(I want my first batten to be 150 mm from top of the roof).
- And that is what I’ve got:
Some of the elements where modified customly, like these:
- Girder beam is extended manually;
- Beam copied from left side;
- Beams copied from top side of this picture.
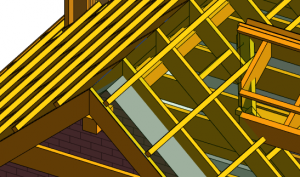
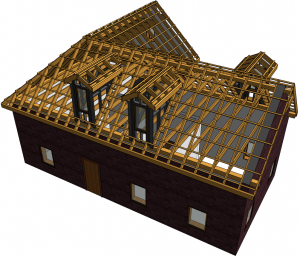
After two hours of modelling and polyshing I’ve got the complete rafter roof model.
Take a look at the final result:
There might be some modifications in it depending on where you’re from, but these are only minor ones.
I will make the same roof with truss system to see if it is faster and we’ll have the capability to evaluate efficiency of these two designs.
If you have any questions regarding this model feel free to ask me by my E-mail.
Next part: Truss Roof


