 Truss+ RT is a powerful application for Autodesk® Revit® that lets Revit users to make their truss design the way he/she wants it to be. For example, in different areas outriggers are done differently.
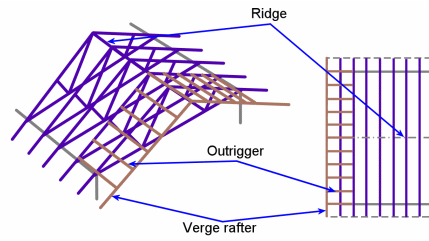
In this article you’ll find one of possible outrigger placement methods when outrigger beams go over the gable end truss.
For this situation there’s truss family lowered Gable Truss (we call it Drop top truss) for such outriggers.
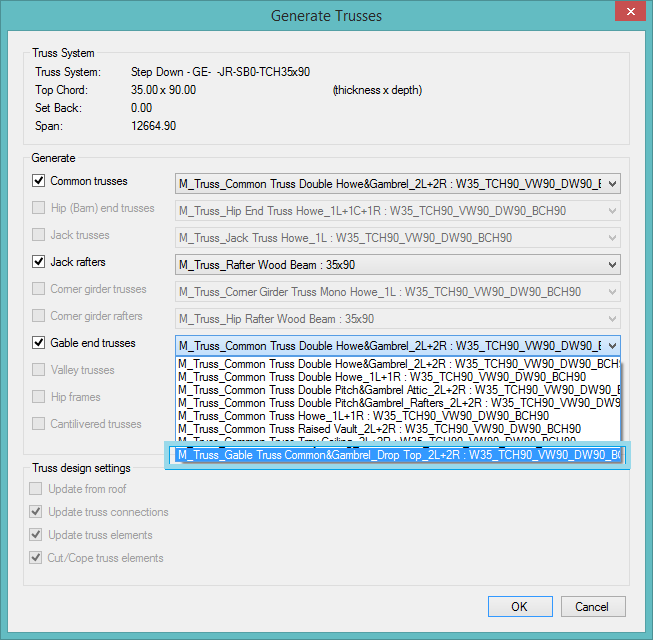
So when inserting gable end truss for generation, select Drop Top type truss from the list:
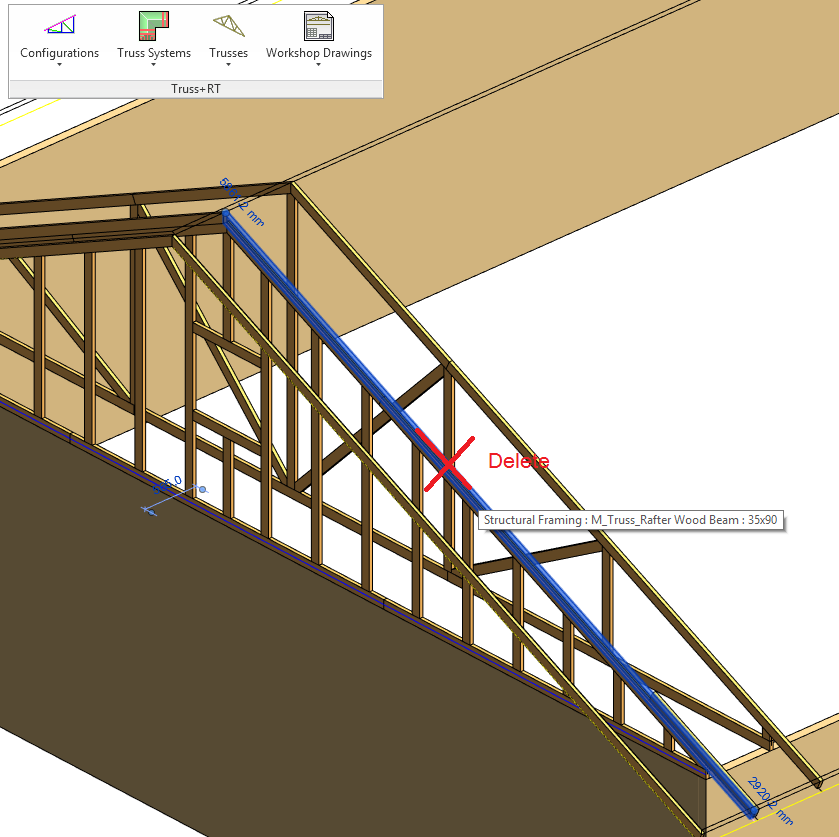
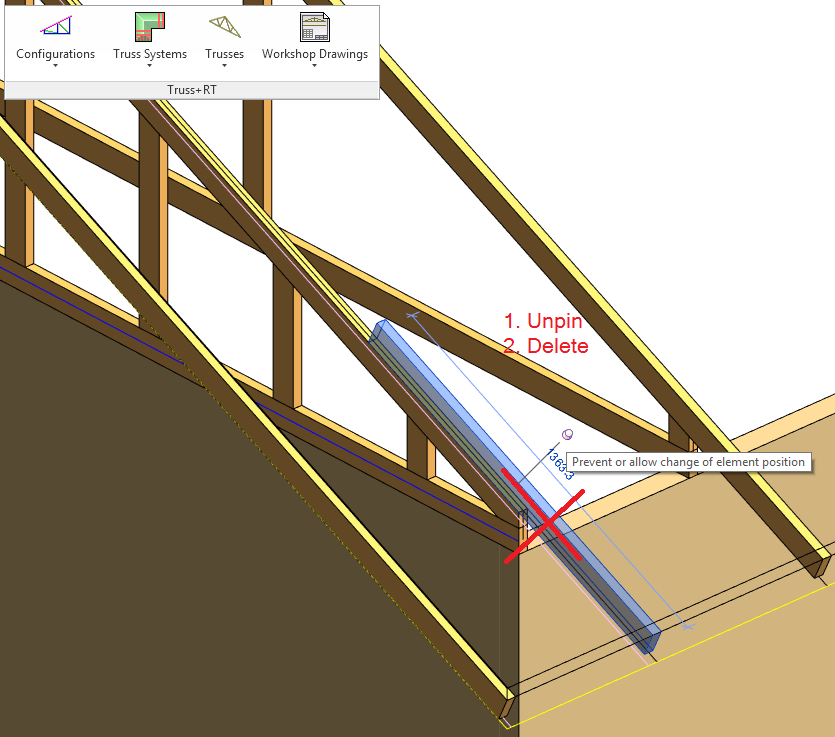
 Then, delete unnecessary structural framings.
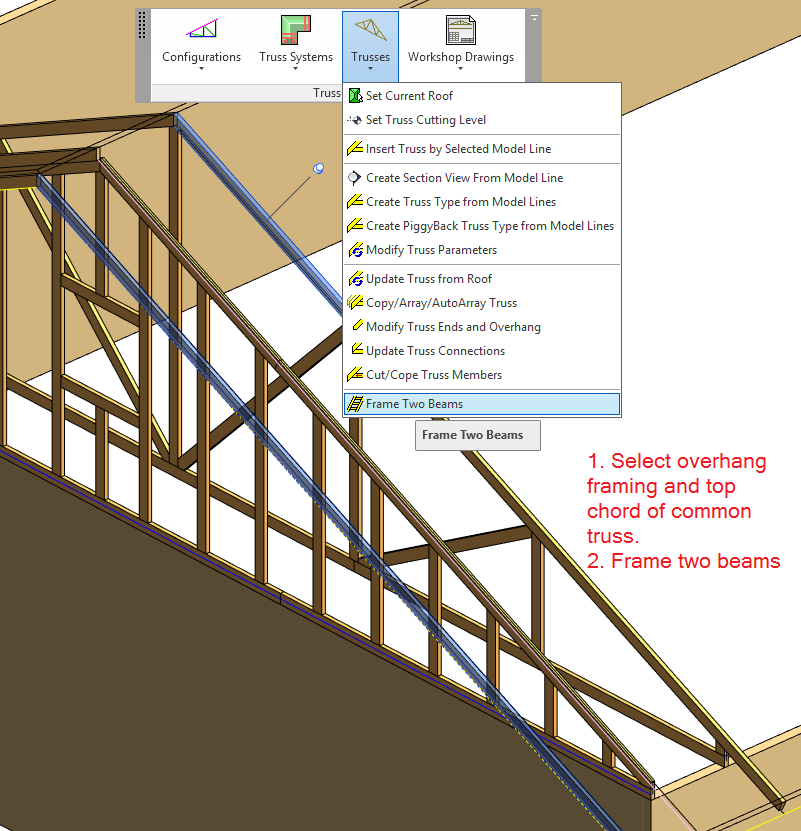
 Then select top chord of common truss and overhang structural framing. Go to Trusses menu category in Truss+ RT and press Frame Two Beams.
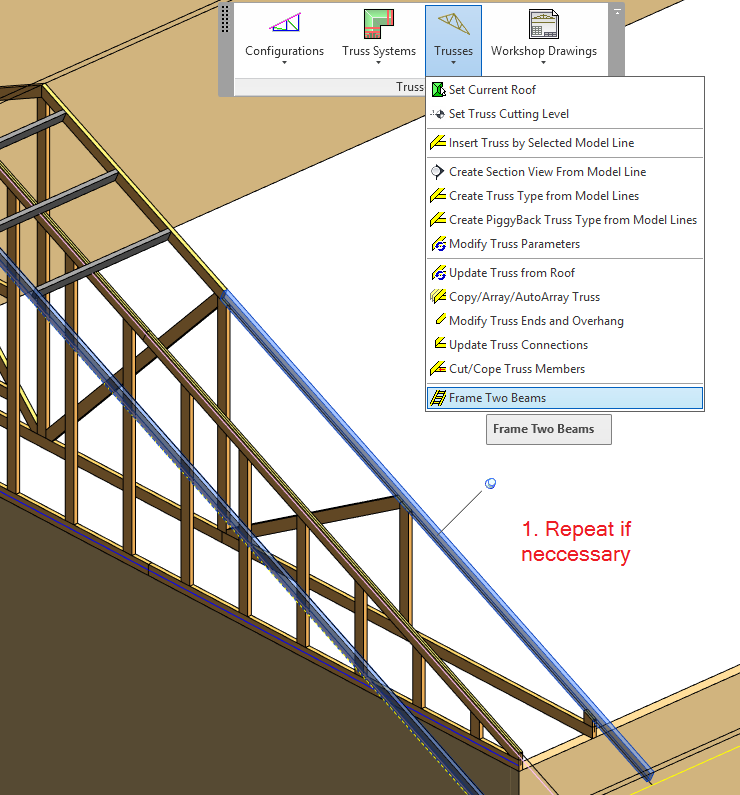
Do the same with other members.
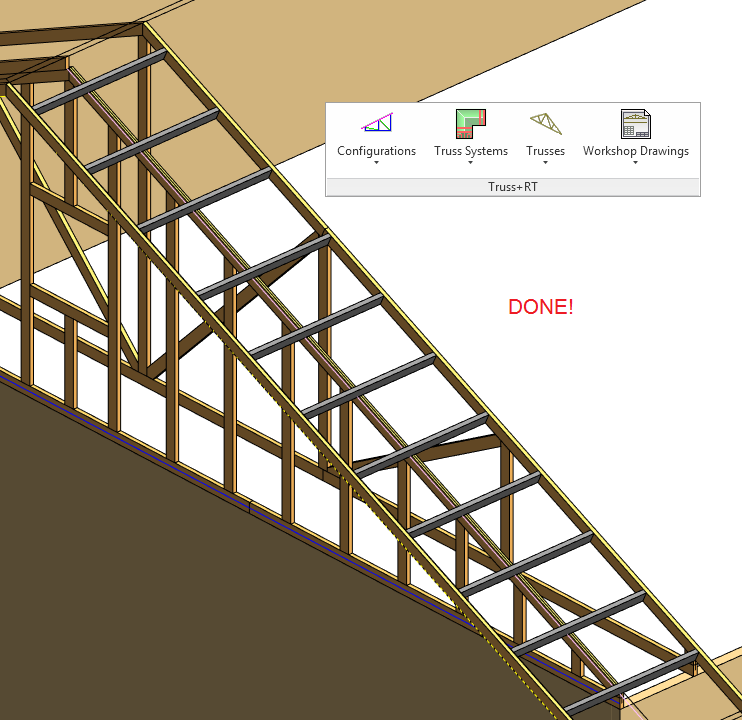
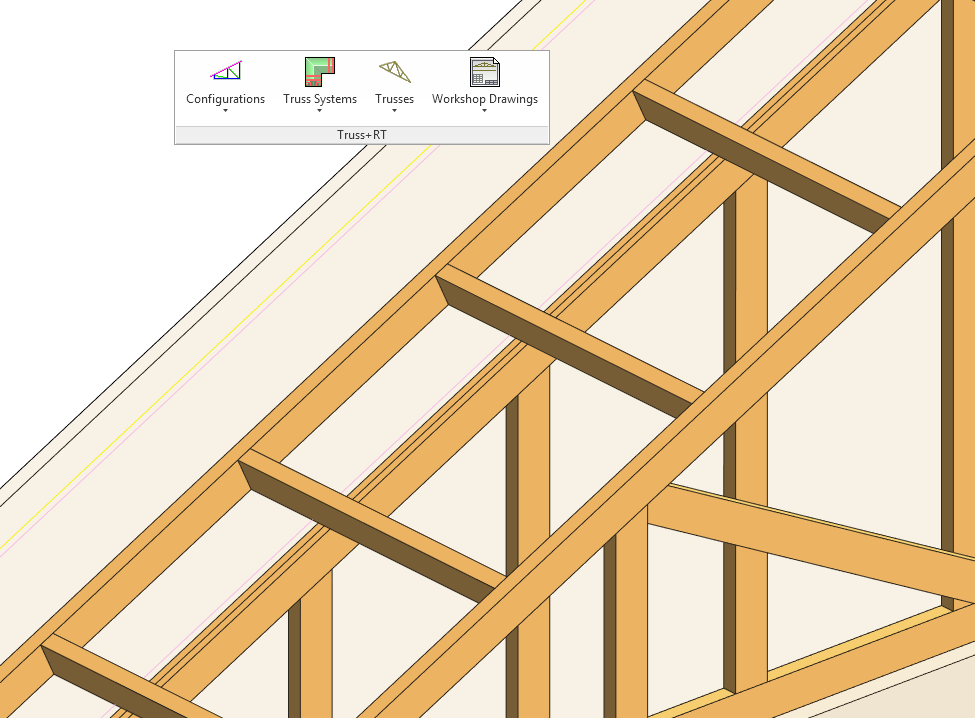
And that is it; you have your outriggers over the gable end truss. Here you can see results of working with Truss+ RT:
If you need more information how to frame Revit models, have any questions or concerns please write us at support@aga-cad.com.


