With the power of automation based on user-predefined rules, our Precast Concrete solution for Revit® streamlines the precast design process, so you can move from concept to construction faster. Modeling floor slabs, walls, beams, columns, and rebar, inserting connection details, and generating shop drawings are all made simple when you have this plug-in.
In this post, we will look at how to work with prefabricated walls using the Precast Concrete plug-in to see how it speeds up the process. As you will see, it’s quite a bit faster than working in plain Revit.
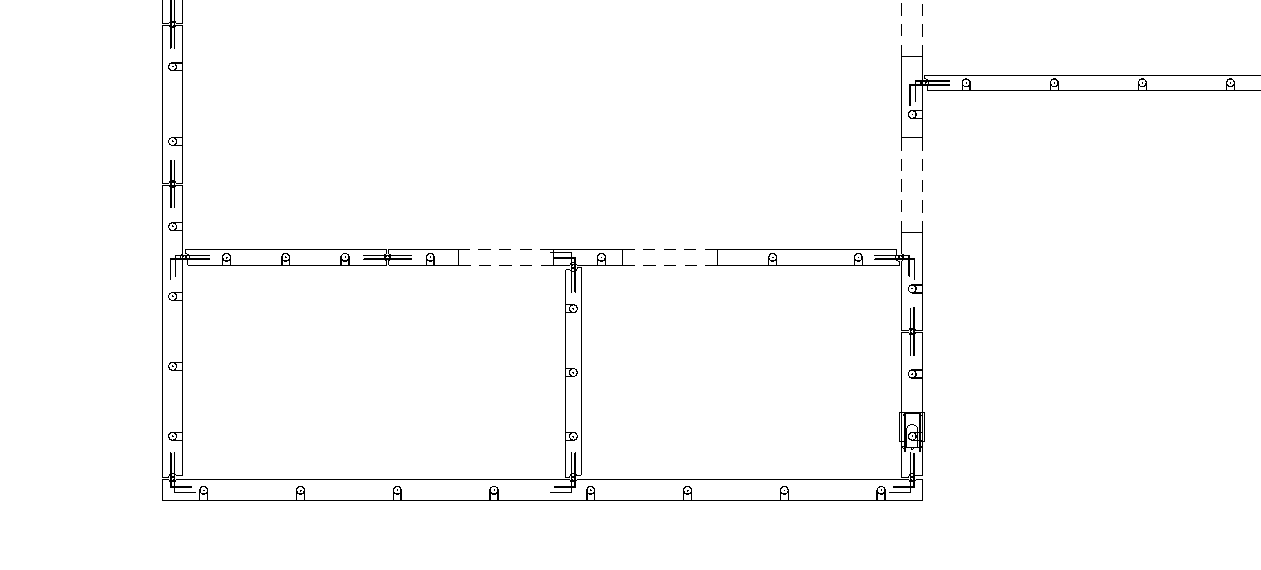
Splitting walls into panels
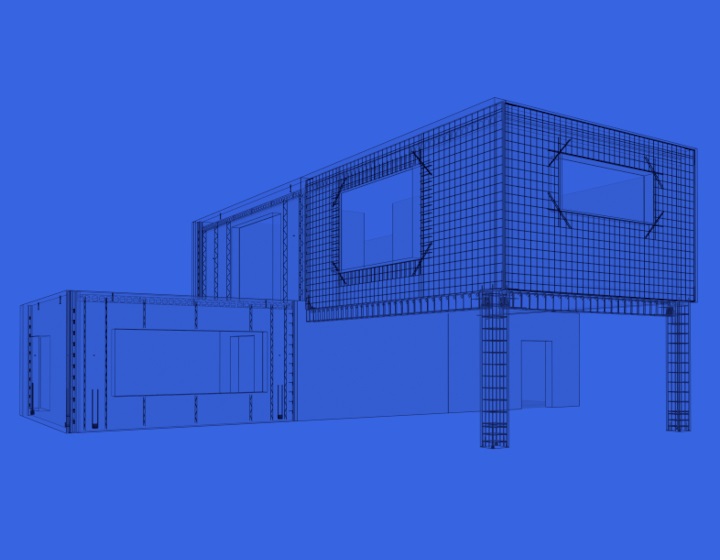
When you’ve created a building with full-length precast walls in Revit, one of the first things to do is split them into separate panels. With native Revit tools, this is not an easy task, especially if the building has a complex shape.
Instead of having to make separate elevation and plan views for each wall to have an accurate split, Precast Concrete has a number of commands that offer you a range of flexibility to split walls automatically by various criteria.
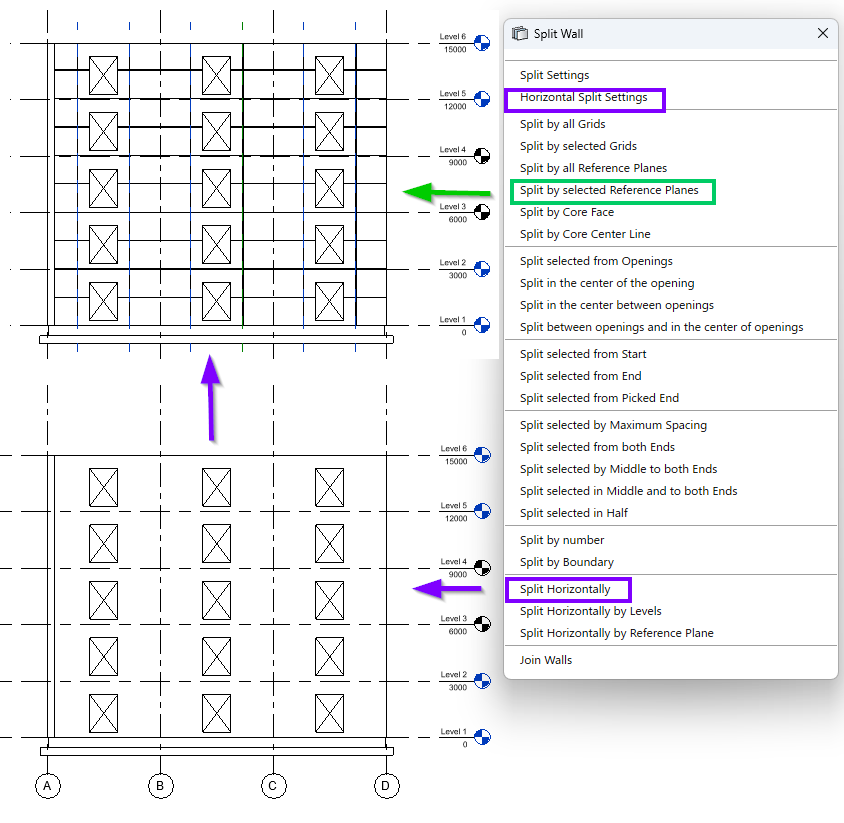
These commands may be found in the menu under the Smart Walls module (a tool that’s part of the Precast plug-in), where there are many options for dividing walls at the desired points.
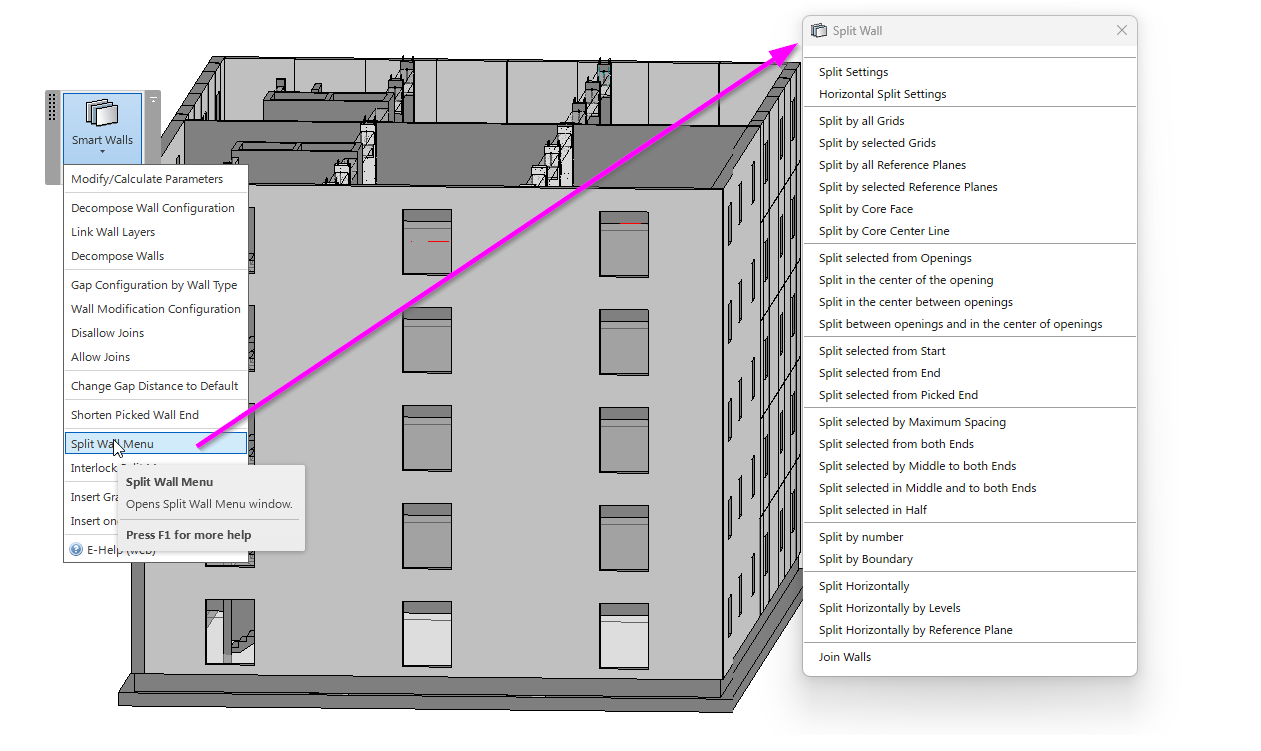
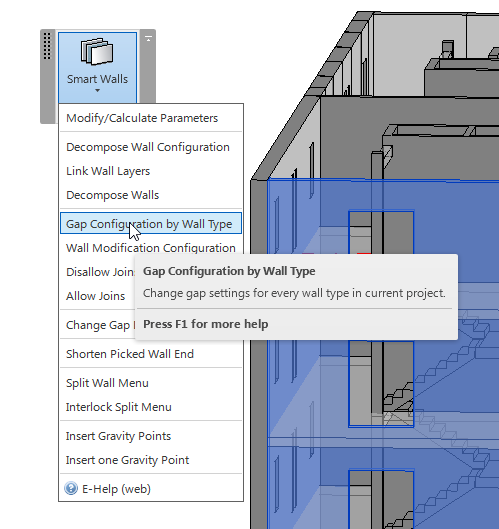
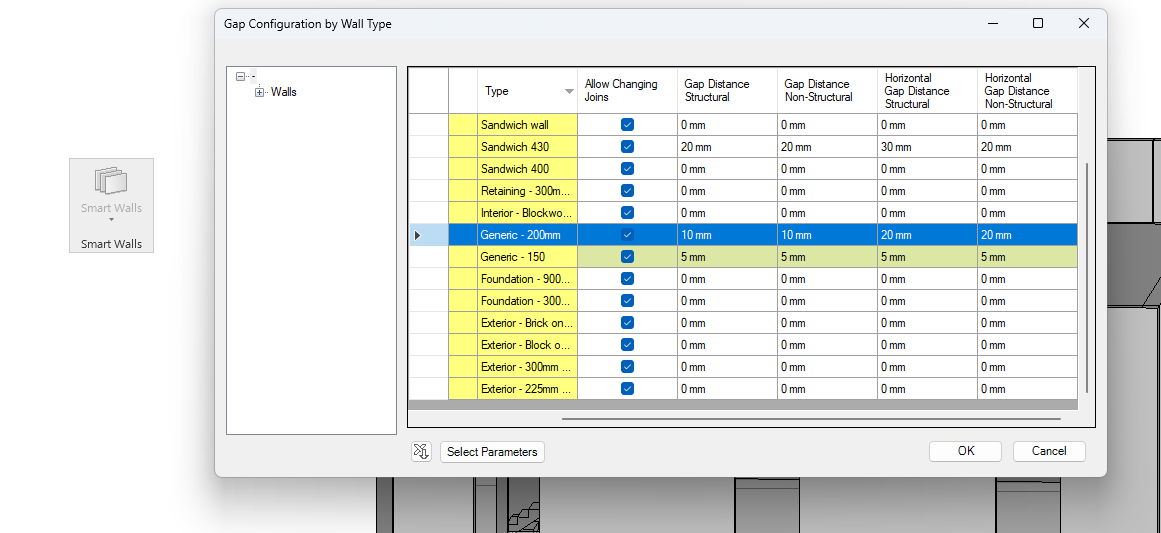
And it gets better than just splitting walls: Smart Walls also allows you to control the gap distances between wall panels horizontally and vertically.
Walls can be split into panels horizontally by levels, reference planes, or heights, as predefined in your configurations. There are even more options for splitting walls vertically: panel size, predefined in split settings, reference planes, grids, or openings can be taken into account.
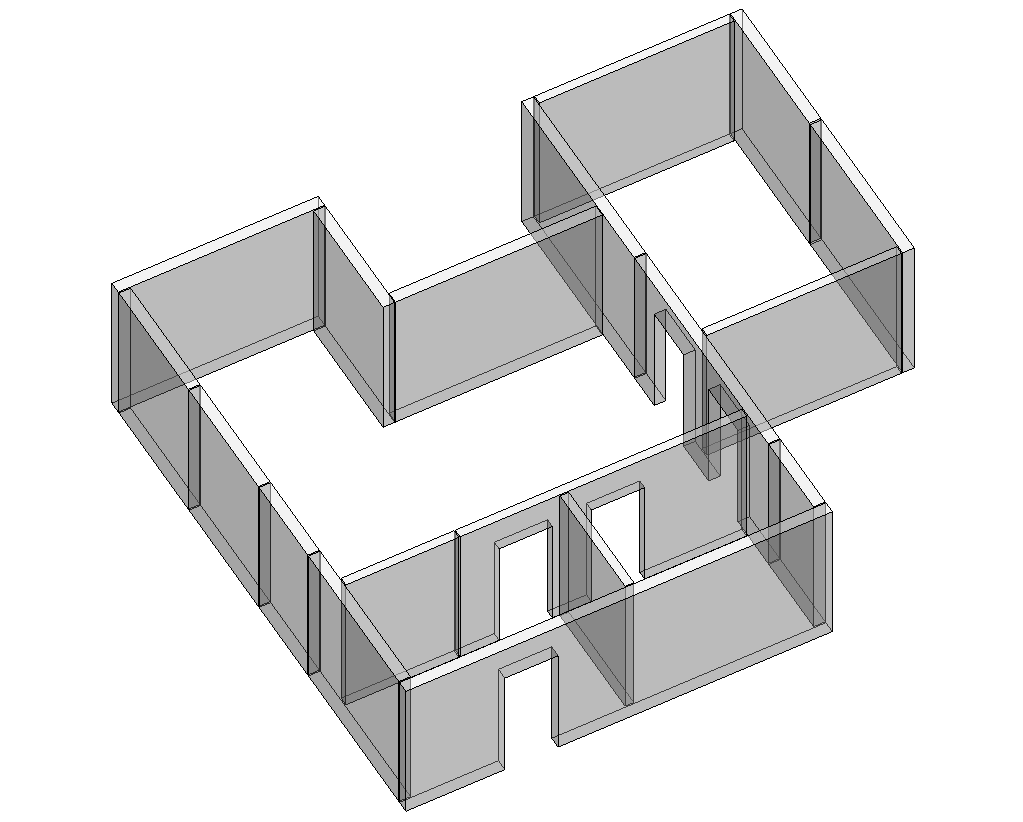
Once you have all the walls split into panels the way you need, it’s time to put them back together with connection details.
Structural connections
All sorts of details may need to be added in a given project to hold precast wall panels together: cuts for slab support, cast-in steel plates, anchor bolts, lifting bolts, lifting anchors, etc.
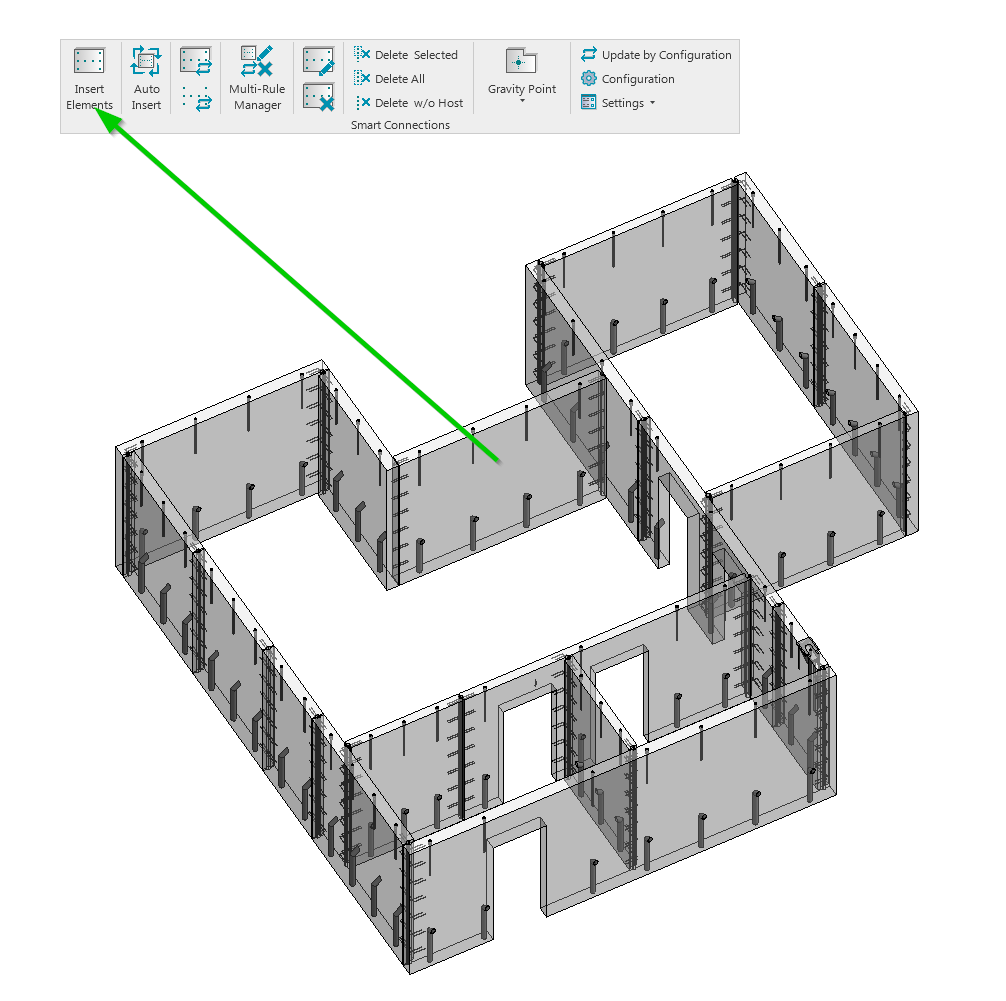
Manually adding connections and cuts can be tricky and takes hours. Precast Concrete includes a tool called Smart Connections, which instantly adds families according to your predefined rules.
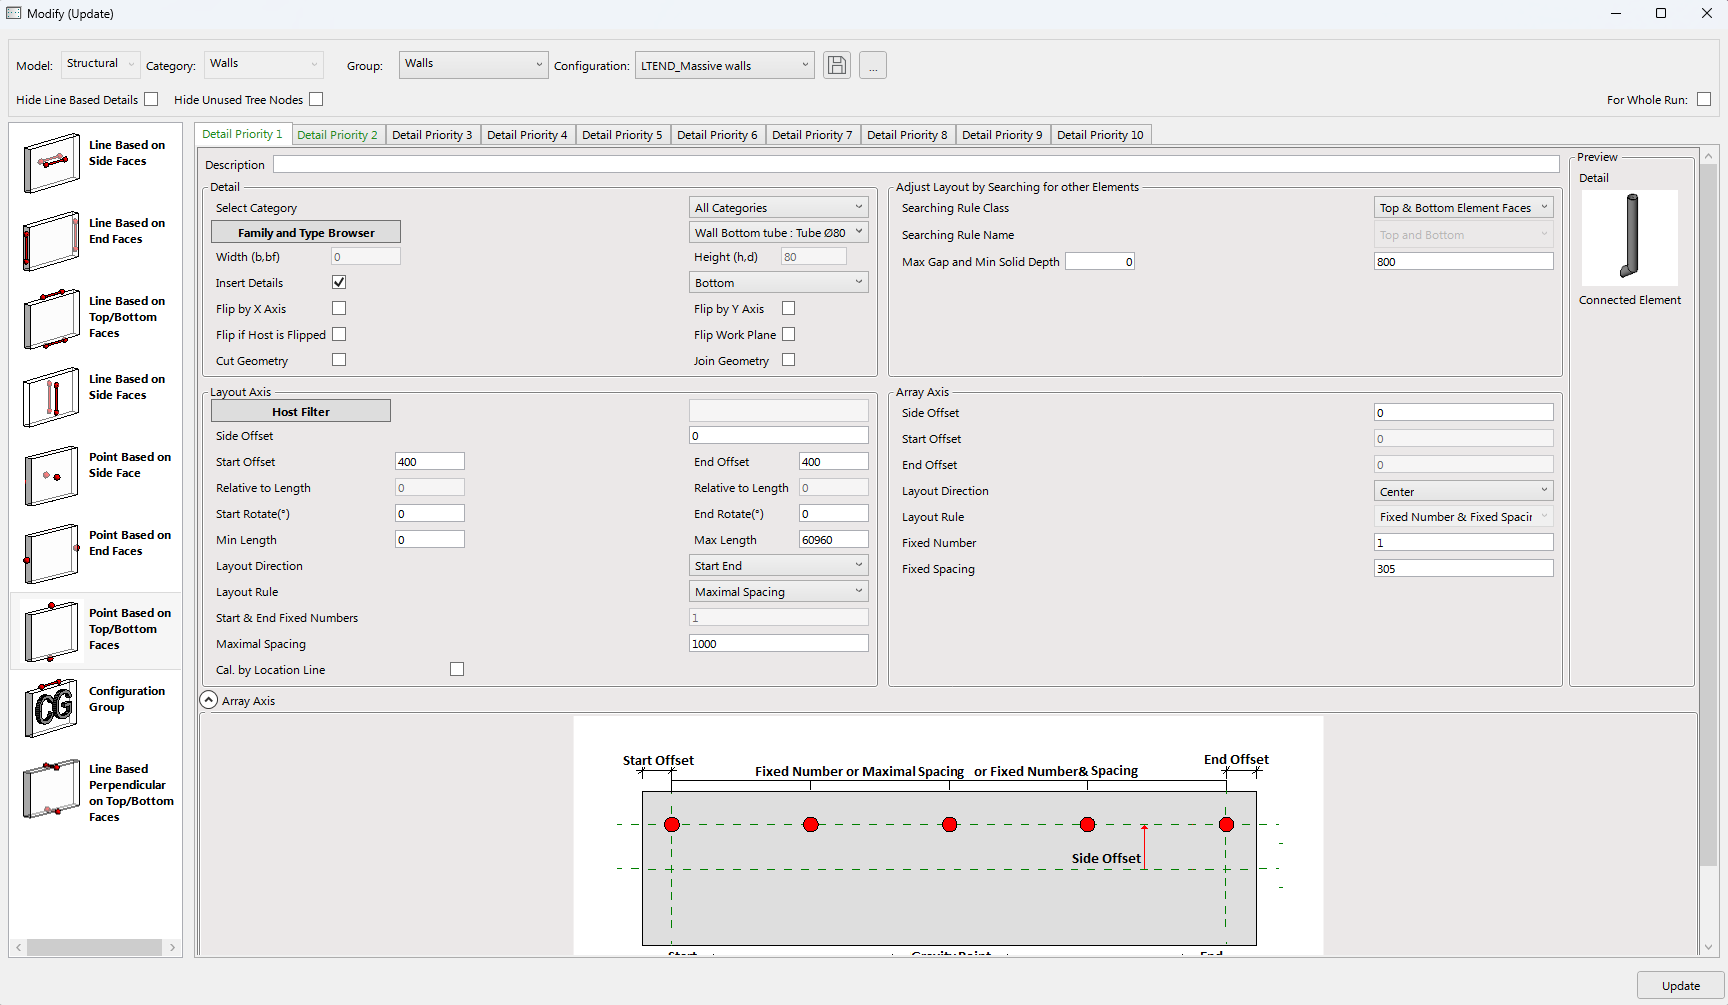
Setting up rules for how face-based and line-based details should be inserted on the different wall faces is straightforward. There are also settings that allow you to place families by gravity point and by surrounding elements. Configurations automatically adapt to element geometry that allows for quick modification of elements if any changes occur.
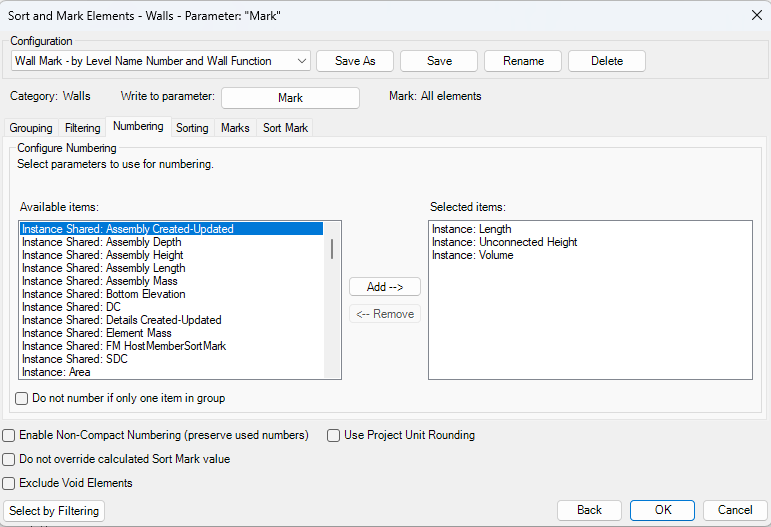
Numbering & sorting
It goes without saying that wall panels need to be identified with project-related information for documentation and construction works. But that can be quite a time-consuming task to do in native Revit.
Once again, Precast Concrete comes to the rescue. Its SortMark tool allows you to number or mark Revit elements by predefined configurations. Group, sort, and mark walls by size, location, or any other available parameter in a matter of seconds.

Documentation
Once walls are modeled and marked, the next step is to create shop tickets. For that, we’ve got Smart Assemblies, another tool included in Precast Concrete. It overcomes the limitations of Revit functionality by creating views automatically, placing them on sheets, and adding tags and dimensions. It can even update existing drawings if any changes are made – no manual work required!
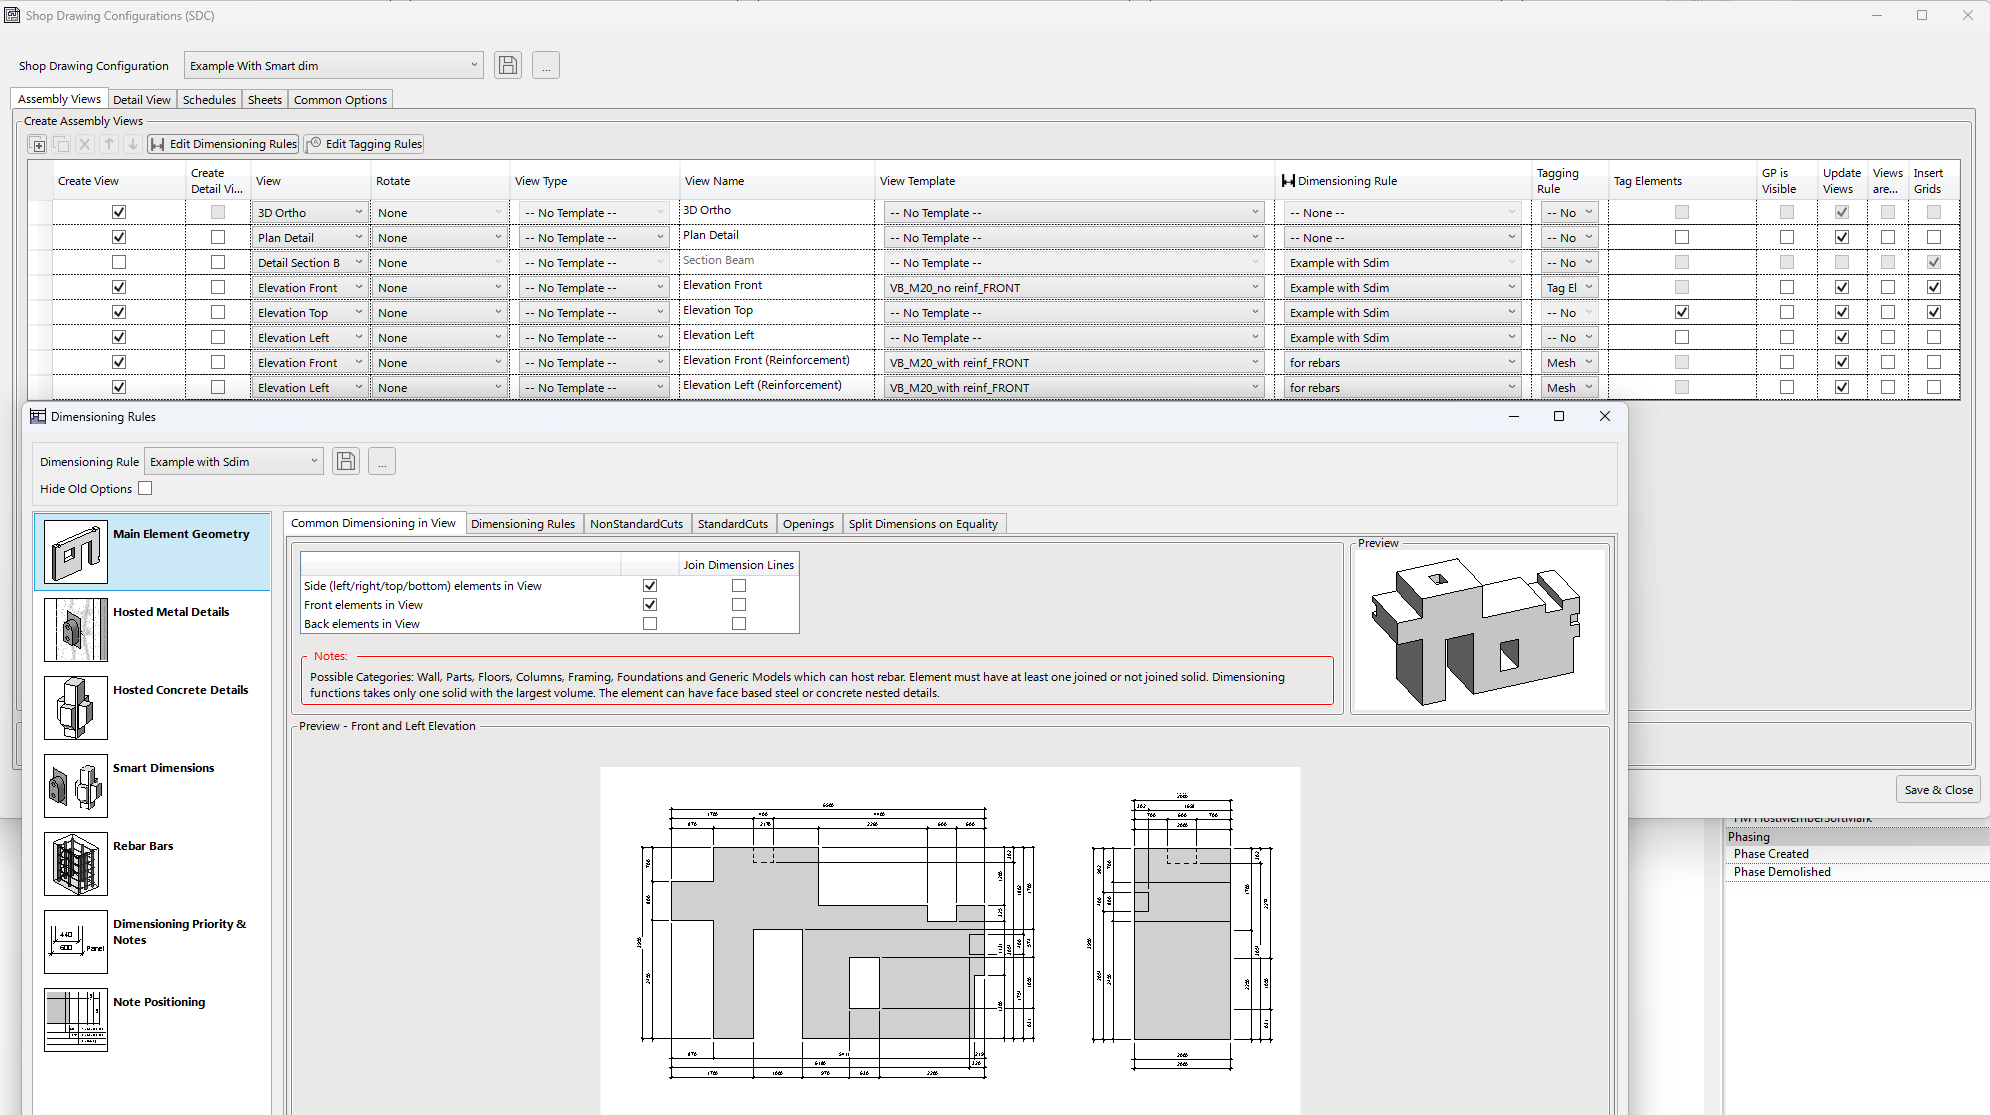
Unlike native Revit, Smart Assemblies automatically adds all hosted elements to a given assembly, and, based on the settings in the configuration, you can reach your desired result, which could be something like this:
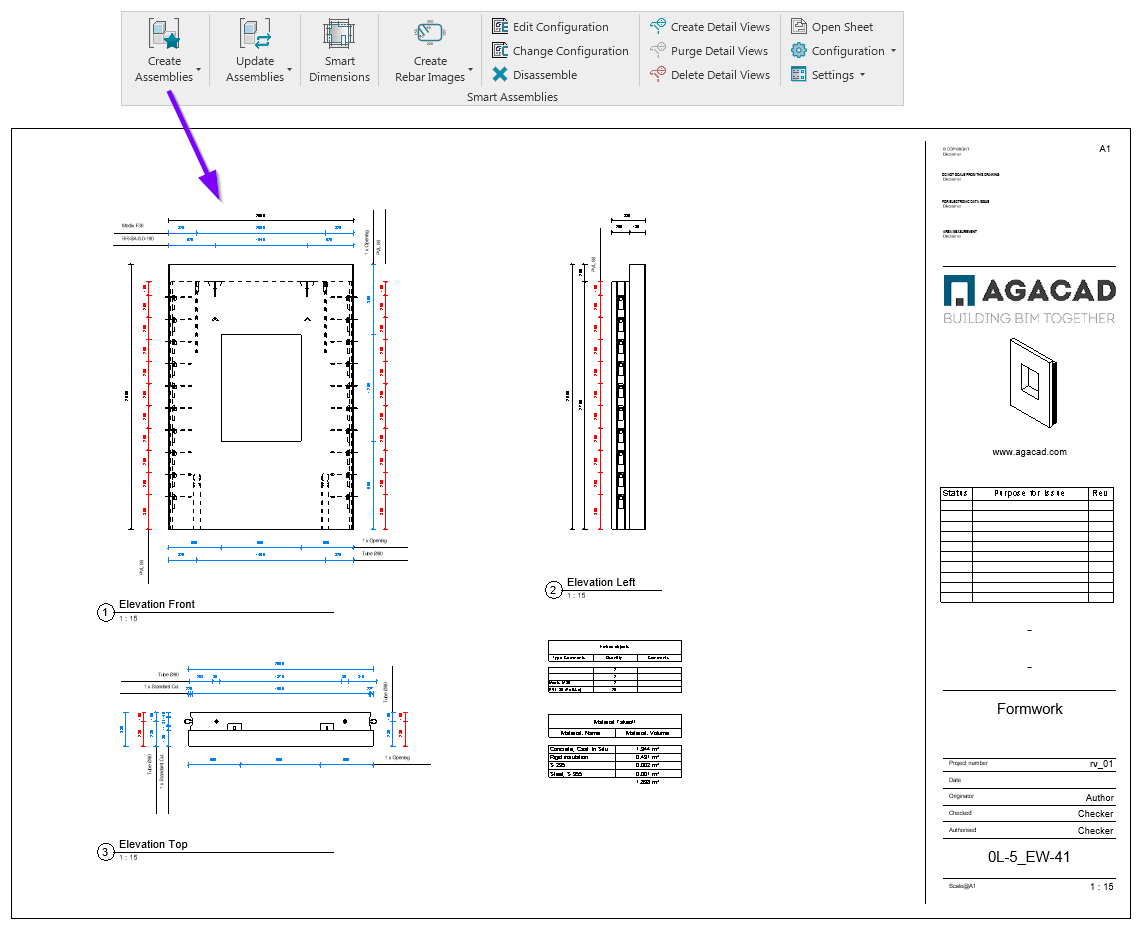
Smart Assemblies works for any possible Revit element category, creating views and schedules with selected templates, and automatically dimensions elements and tags in views according to your predefined rules.